Sheets and the editor
This page is about writing in the editor: what a sheet is, the markup and how to type it, comments and the other notes you leave in a text, links and pictures, and how sheets are glued, split and merged. The editor shows the Markdown as you write it, and the file underneath is plain Markdown.
A sheet
A "sheet" is one Markdown file. Its title is its first line, a heading or just the first line of text, and there's no separate title to fill in. The file gets its name from the title when you first write it, and then the name stays, even if you change the title, so nothing that links to it in Obsidian breaks. Rename File to Match Title in the sheet's right-click menu renames it when you want.
Typing saves on its own, a moment after you stop. The number at the top right is the "counter": click it to count words, characters, sentences, paragraphs or pages, and select some text to count just that.
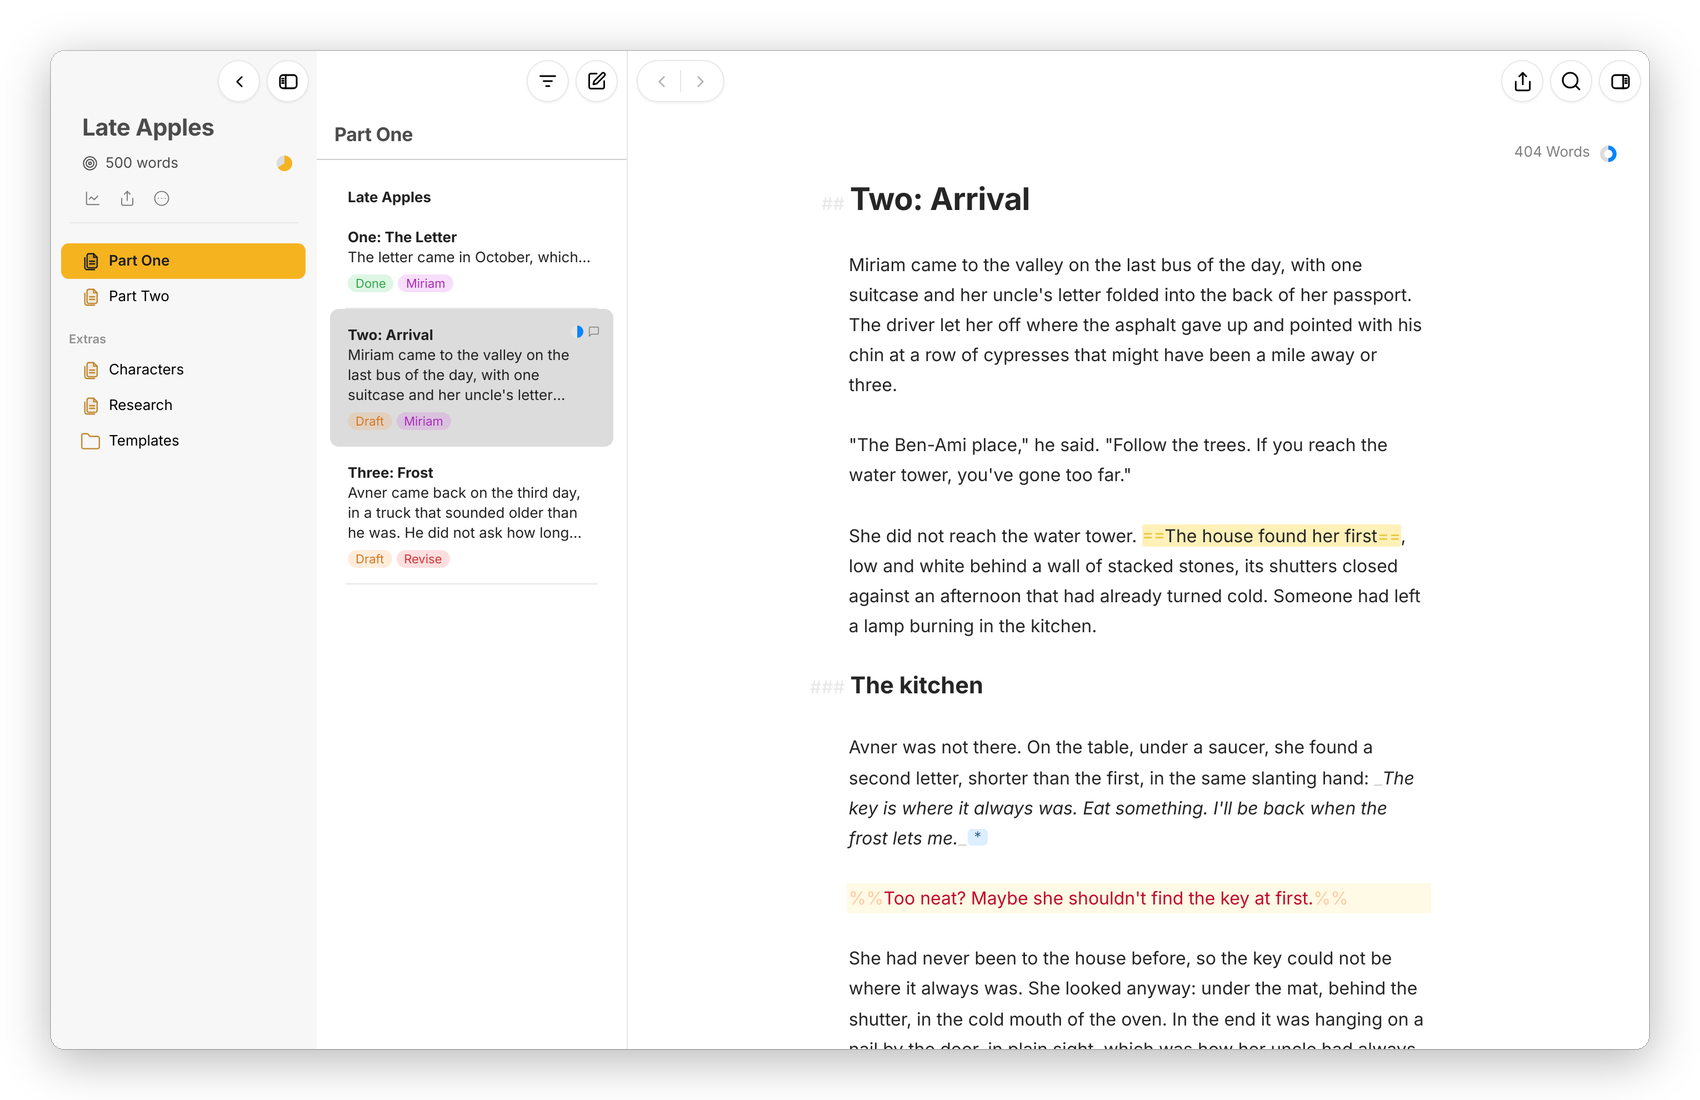 A chapter in the editor: headings with their
## greyed, a highlight, a footnote (the small star), and a comment.
Markup
The markup stays in the text, greyed out, so the words read cleanly. You can type it, use the keys, or press ⌘9 for a menu of every kind.
| What | You type | Key |
|---|---|---|
| Title, heading, subheading | #, ##, ### at the start of a line |
⌥⌘1, ⌥⌘2; ⌥⌘0 for a plain paragraph |
| Strong | **strong** |
⌘B |
| Emphasis | _emphasis_ |
⌘I |
| Mark (a highlight) | ==mark==, or type ::mark:: |
⇧⌘H |
| Comment, never exported | %%comment%%, or type ++comment++ |
⇧⌘C |
| Delete, never exported | {--delete--}, or type \|\|delete\|\| |
⇧⌘D |
| Annotation | {==text==}{>>the note<<} |
right-click › Annotation |
| Footnote | ^[the footnote], or type (fn) |
right-click › Footnote |
| Link | [text](https://…) |
⌘K |
| Link to another sheet | [[ and the sheet's name |
|
| Image | , or type (img) |
paste or drop it in |
| Lists and quotes | -, 1., > |
⌥⌘8, ⌥⌘7, ⌥⌘Q |
| Table | a pipe table, or type (tbl) |
|
| Table of contents | (toc) on a line of its own |
|
| Equation | $E = mc^2$, or $$…$$ for a block |
Smart Tags in Settings › General is what turns the short tags ::, ++ and || into the file's own tags as you type, so your fingers can keep old habits and the file stays readable in Obsidian. Smart Lists continues a list when you press Return, and Tab and Shift-Tab indent and outdent it. ⌘L clears the markup from the selection.
Pasting from Word, Google Docs or a web page keeps the bold, italics, links, headings, lists and footnotes, as markup. ⌥⇧⌘V pastes plain text instead.
Comments, annotations and revisions
There are three ways to leave a note in a text without it reaching the reader. A comment (%%…%%) is a line in the text, shown in red; a whole paragraph can be a comment too. An "annotation" is a note attached to a few words, which you read and change by double-clicking them. A footnote shows as a small star, and a click on it opens the footnote to edit. A deletion ({--…--}) marks text to cut without cutting it yet. None of them are exported, except in the Revision export style, which shows them on purpose.
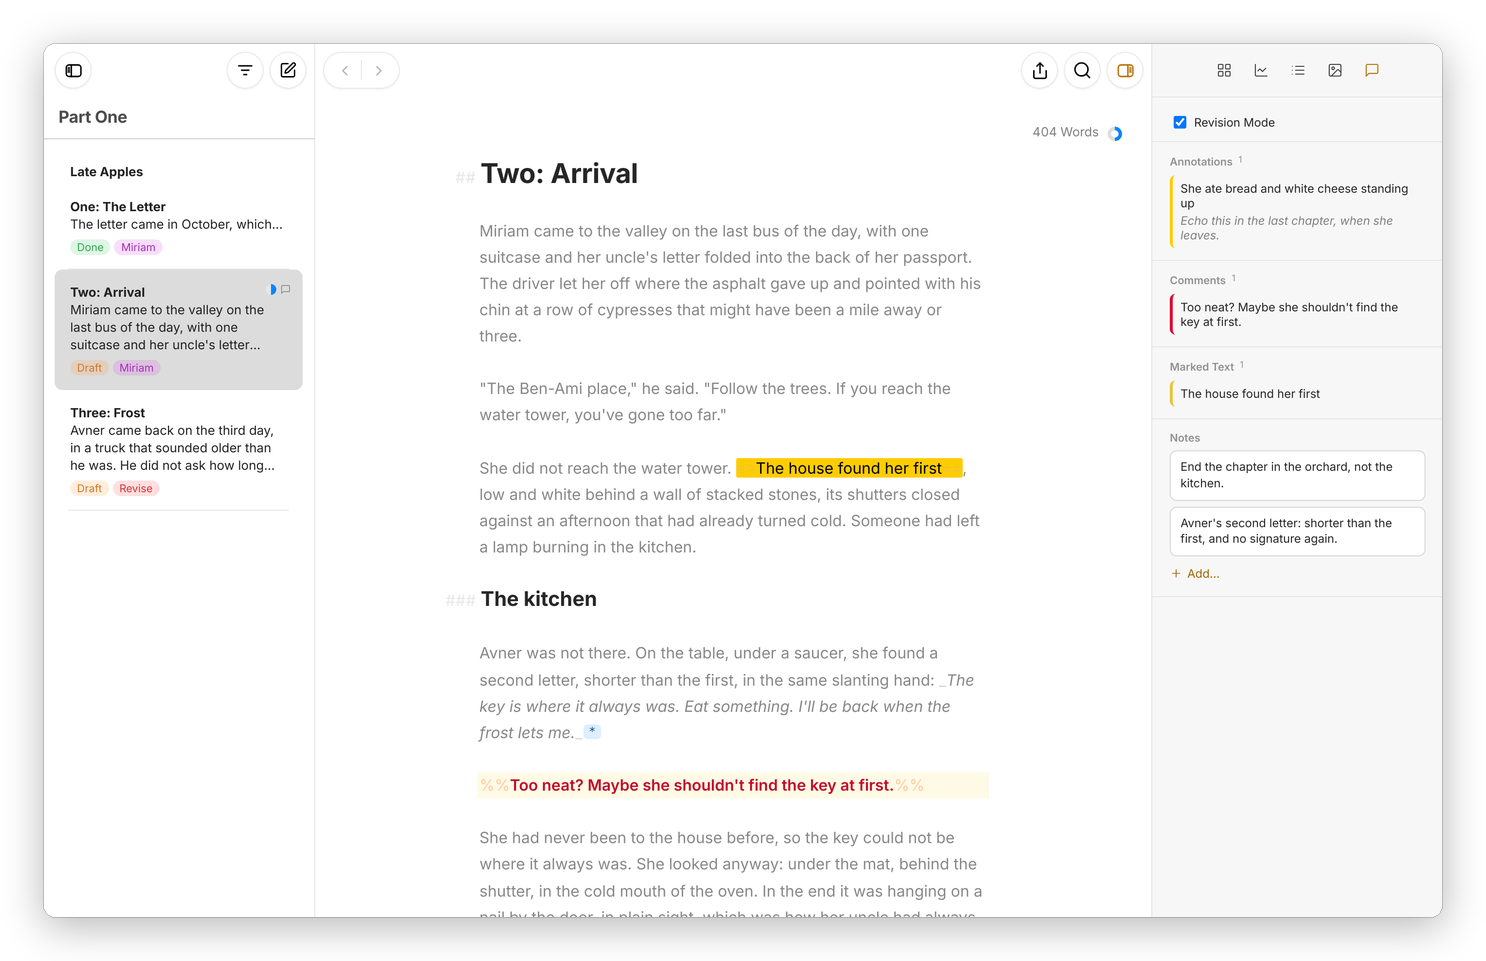 Revision Mode lists the annotations, comments and marked text in the dashboard; a click goes to each one.
Revision Mode (⇧⌘E) dims the plain text so the marks stand out, and lists them in the dashboard. Click a kind's heading there to see only that kind. Tracked changes from Word come in as {++added++} and {~~old~>new~~}.
A sheet can also carry notes of its own, outside the text: press the + beside Notes in the dashboard. They're kept in the sheet's front matter.
Links and pictures
Typing [[ offers every sheet in the library by title, and after a #, the headings of the one you picked, which is how Obsidian writes a link too. ⌘-click a link to another sheet to open it there. A web link opens in the browser with ⌘-click, and a double-click shows its address to change. The dashboard lists the sheets that link to the one you're in under Incoming Links.
Paste or drop a picture into a sheet and Moshe saves it in a _media folder beside the sheet and writes the image tag for you. Settings › General › Image Previews shows it in the text, a few lines tall, or in Full Color.
Glue, split and merge
A long text works best as many small sheets. Select a few sheets in a group that's sorted manually and choose Glue Sheets: they stay separate files, but the editor shows them one after another as one text, and a line in the sheet list marks them. Unglue Sheet separates them again.
Split at Selection (⇧⌘B), or Split Here… in the editor's right-click menu, cuts a sheet in two at the cursor, and the two halves are glued. Merge Sheets does the opposite: the selected sheets become one, in their order, and the others go to the Trash.
Two sheets at once
⌥⌘3 opens a "second editor" beside the first, and ⌥-click in the sheet list opens a sheet there. Its … menu has Swap Editors, Arrange Top/Bottom and Dim Second Editor, and ⌥⌘← and ⌥⌘→ move between the two. Translation mode is the second editor with a sheet's translation in it.
Finding text
⌘F finds in the sheet, ⌥⌘F finds and replaces, ⌘G and ⇧⌘G go to the next and previous match, and ⌘E uses the selection to find. ⇧⌘F searches the whole library.